I get on these kicks where I read gourmet blogs and this one I happened across one night talked about these amazing chicken, corn, and tomatillo tamales they had at a restaurant somewhere in New York. This, of course, sent me on a mission to find a recipe for them! I wound up using two different recipes and adjusting them to my own personal wants. They turned out really good!
I've never made tamales before so if you are a seasoned vet, please do not make fun of me! LOL I was surprised at how easy they were to make. Having asked around, it seemed like it would be a more arduous task. I think if you use pork it would be. From start to finish, these took about 2 hours to do. I made extra and froze them so I can have more another night. Yessss. I love that!

Begin by putting cornhusks in a pan of water. Set something heavy on top to keep them submerged in the water.

Cut up one small onion. I had to use green onion because I was OUT of regular onion. Bummer.

Mince one clove garlic.

Cut up three tomatillo.

The recipe calls for Pasilla chilies. Pasilla are the name of the fresh pepper, which is a very dark green. Can't find them around here, sadly. Dried are called chile negro and work fine as a substitute for fresh. You will want to cut the stem off then cut into pieces.

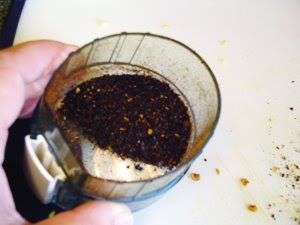
Put all of the pepper pieces into a spice grinder and grind until you're content.
If for some strange reason you can't find fresh or dried, use chili powder.

Cook up some chicken breasts. Remove from the pan and let cool.

Once cool, shred with your fingers or with a fork.

Heat a little oil or butter in a skillet. Add the onion, garlic, and chili powder to the pan and saute for a minute.

Add the tomatillo and stir in. Cook for another minute or two.

Add 1/3 cup frozen corn.

Dump in one can drained and rinsed black beans.
Cook this down for about 5 minutes. Add a little water to the pan if needed to avoid burning.

Add the chicken in. Season the entire filling well with salt and pepper.

Squeeze in the juice of half of one lime.
Set the filling mixture aside.

Now to make the masa cake.
In a bowl put 3 cups masa harina, 1 tsp salt, 1/2 tsp baking powder, 1/2 cup oil, and 3 cups chicken stock. You want almost a playdough type consistency.

Take some of the cornhusks and carefully pull them apart into thin strips. Tie two pieces together to create laces. You're going to need these to hold the tamales closed.

Take some of the masa (about 1/4 cup) and put it on one of the soaked cornhusks. Press it out using your hands.

Don't ask me what is going on with the lighting on this picture. Put a spoonful of filling on the masa.

Fold the husk over in half, and then fold the edges in.

Take another piece of cornhusk (one of the smaller, thinner pieces) and fold it over the top opening. To secure it, wrap and tie using one of the husk laces we made.

Keep repeating this process until you've used up all the masa and/or filling.

Now it's time to cook these babies. If you have one of these pasta pots, great! You want to steam the tamales - not bake. If you don't have one of these pots, put a colander in a pan upside down. This will keep the tamales from resting in the water on the bottom of the pot. Put a lid on the pot and bring the water to a boil (make sure you don't use too much water!! Just enough to steam these guys!).

Put the tamales into the steamer and cover with a lid. Steam for about 40 minutes, rotating them halfway through the cooking process. You'll know they're done when the masa pulls away from the husk easily.

Serve with rice and beans if you want. Top with sour cream and guacamole.
These weren't very spicy so we had salsa with them too. Perfect!
So you can see that homemade tamales CAN be achieved in your house and it won't take 3 days either!!! You'll definitely want to make a lot of these so you can enjoy them again and again. This recipe made 16 tamales. Enjoy!
Printable version:
http://docs.google.com/Doc?id=dg2vfjqm_84c5dkrzhk


 And finally add 1 can of diced tomatoes. I used the spiced tomatoes that have chili spices in it.


