I had mentioned in a couple of entries prior to this one that I will be adding some of the recipes for the other Valentine menus I posted. I will apologize in advance because in order to get all of the meals posted before the holiday, I'll be posting a lot. Maybe even two times a day. I've been bad about typing up the recipes in a printable format. I will spend today getting everything typed and uploaded. :)
I made creme brulee yesterday. It's my dad's most favorite dessert, next to peach pie. It's a custard, which means it's made mostly of eggs and sugar.. and then steamed in the oven. These turned out so delicious and creamy. I topped with fresh strawberries and blueberries. Feel free to garnish with whatever fruit you'd like, or just leave plain. If you choose to make this for your Valentine, I know he/she will love you forever.
This recipe filled 3 ramekins. I thought I could get four out of this recipe, but it didn't happen. If you're feeding more than 3, you might want to adjust the recipe accordingly.
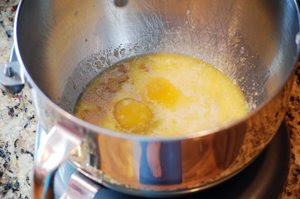
In a bowl, put 8 egg yolks and 1/3 cup sugar.
Add 2 cups heavy whipping cream and 1 tsp vanilla.
Whisk everything together.
This is a crucial step so don't skip it. You need to strain the mixture into another bowl. This will remove any lumps or egg particles because we want a smooth custard. Not a lumpy one.
Ladle the mixture into your ramekins. If you don't have ramekins, I really suggest you buy some. If you can't find ramekins, use little coffee mugs. They'll work just fine and that could be really cute!
Place the ramekins in a baking dish and fill the dish up with water. The water needs to come halfway up the side of the ramekin.
Place in a 300* preheated oven for an hour. The centers will still be slightly loose but the edges should be set.
After that hour, turn your oven off, but leave the pan in there. We need to slowly cool these down.
Once they're cool, pull from the oven and let sit on the counter until they come to room temp. Remove from the baking dish and cover each ramekin with saran wrap. Put in the fridge and allow to chill at least 2 hours. You can keep them in the fridge up to 2 days, so you can make these babies up days ahead of time!
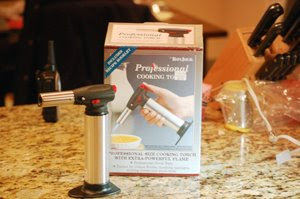
For the finishing touch, you'll need a cooking torch. Don't have one? Just turn on your broiler to high. That should work okay.
You're also going to need superfine or caster sugar. You could use regular granulated, but it will take longer for it to burn/caramelize.
This final step is done after the brulee is completely chilled and set and right before you want to serve.
Sprinkle the tops of the brulee with some of that superfine sugar.
Using the blow torch, go in circular motions until the top is golden brown. The sugar will create a thin sheet of hardened, caramelized sugar. The signature for creme brulee.
Again, if you don't have a torch, put these under a hot broiler until the sugar browns. Pull from the oven immediately. Make sure you keep an eye on them. We don't want to melt the custard!
Place the ramekin on a dessert plate and garnish with fruit and a sprig of mint.
Printable version:
http://docs.google.com/Doc?id=dg2vfjqm_129fhdk2jgk
Friday, January 30, 2009
.creme brulee.
Posted by
squillen
at
10:36 AM
4
comments
![]()
![]()
Thursday, January 29, 2009
.shepherd's pie.

I really do think I'm on an English cooking kick lately. I've been watching too much Gordon Ramsay and Raymond Blanc, apparently. This recipe is adapted from one of my Martha Stewart cookbooks. What can I say? I'm a Martha girl at heart. Her recipe calls for potato and rutabaga on top, but I used straight potatoes. The deep, rich sauce was just amazing and trust me, if you've made this in the past using canned soup, you're really going to see a tremendous difference.
This recipe made enough to feed 3 people. I was surprised it didn't make more and I will remember that the next time I make this dish.
Begin by taking 2 pounds boneless beef or lamb for stew. I couldn't find stew meat, so I bought chops and cut it up into bite sized pieces. Make sure you trim off the fat.
Take 1 celery stalk, a couple sprigs or thyme, 1 sprig of rosemary, 1 bay leaf, and 1 clove of garlic. Martha suggests you put all of this in cheesecloth but I couldn't find mine... so I did the next best thing......
I used butcher's twine. This is called a bouquet garni. We want to give the essence of these herbs to the dish, but not necessarily add all of it in. Does that make sense?
Chop up one onion.
Peel and chop 2 carrots.
In a skillet, melt 2 Tbsp butter over medium high heat. Once it's melted, add the lamb or beef and sear all the sides.
When the lamb is browned, add the chopped onion and cook for about 5 minutes until the onion starts to cook and become translucent.
Sprinkle 2 Tbsp flour on top and mix everything around. Turn the heat down just a bit. If this starts burning, pull away from the heat. You just need to coat the onion and meat with flour and cook it just a little bit.
Add 1 cup dry red wine. It will start thickening immediately so keep stirring and don't walk away from the pan.
Add 1 cup beef stock and our pretty little bouquet garni to the pan. Bring to a boil and then cover the pot. Reduce the heat to low low low and let cook this way for ONE HOUR. This will make that lamb soooooooooo tender.
After an hour, add the carrots. Cover again and cook for 30 more minutes. After those 30 minutes, remove the lid and let cook for a final 30 minutes.
Taste the sauce at this point. Season with salt and pepper. You don't want to season at the beginning because the sauce reduces and reduces and if you add salt at the beginning, it will only concentrate the saltiness and you could wind up with a sauce that is unedible.
While the sauce cooks those last 30 minutes, peel and chop up 6 or 7 potatoes. I used a mix of yukon gold and russett. Put the potatoes in a pot, cover with water and a dash of salt and boil until fork tender.
Once the potatoes are cooked, put in a strainer and let drain until they are dry.
Put the potatoes in a mixing bowl and whip with a little heated milk until they're creamy. Season with a little salt and pepper.
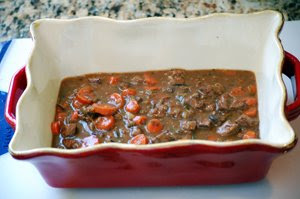
Remove the bouquet garni and pour the filling into the bottom of a baking dish. You could even put this into ramekins if you want to make fancy little individual servings.
Spoon the mashed potatoes on top of the "stew" and spread all over the top using a frosting blade, or spatula.
Bake in a 350* oven for about an hour.
Serve with fresh bread and salad. Enjoy! (Martha if you happen to read this, thanks for a great recipe!)
Printable version:
http://docs.google.com/Doc?id=dg2vfjqm_128f9w585dz
Valentine Dinner Update!
After reading over the votes, it looks like the menu I will prepare is #2. Crab cakes, Spinach Salad, Filet Mignon, Garlic Mashed, and Chocolate Souffles!
I was talking with my oldest sister, Ronda a day or two after posting the options and she told me she thought I was going to post all of the recipes. I had to re-read what I blogged to see whether I was unclear. But now I'm thinking that I will post a few of these other recipes for those who didn't want the steak. In fact, I have creme brulee in the oven baking as I type and am about to put the cornish hens in the marinade.
I will have the creme brulee and hen recipes up next week. The shopping list for menu #2 will be up this weekend. I will put it in .doc format as well so you can print it out and have it all handy for when you hit the store. (I'm too good to you all.. lol)
If you have any questions, let me know! Have a great day. :)
Posted by
squillen
at
11:10 AM
7
comments
![]()
![]()
Wednesday, January 28, 2009
.honey wheat bread.

Hey Linda Jones! This one is for you! :D :D
Last Friday I got to meet my neighbor across the street. Her name is Mary and she's a very nice lady. Paige and I thought she and her husband, Joe, might like some fresh bread! (Did you get that.. I live across the street from Mary and Joseph. LOL!!!)
When I had the bakery, there was a gal who came in every other day to buy wheat bread. She loved it. She even said her husband would send her in even if she didn't feel like it because he NEEDED the bread. Now that I think of it, they must have consumed a lot of bread on a daily basis if she was coming in every other day. She was a great customer.
I love wheat bread too. For some reason it just screams "healthy" to me.. even though I still use a little white bread flour, and honey. You will probably find that this bread rises like crazy. You would think the opposite when it comes to wheat because whole wheat has virtually NO gluten. (Remember? Gluten is that thing that helps give bread dough elasticity. It's a good thing.)
Start with 1 cup heated milk. Put that in a bowl with 3 Tbsp butter and 1 tsp sugar. Yeast loves sugar so don't leave it out. It's just 1 tsp!!
Add 1 cup warm water and 4 tsp yeast (or two of those little pouches). Let the yeast proof for about 10 minutes.
Add 1/3 cup honey.
And then break in 2 eggs.
It's time to put the bowl on the mixer and add the flour. I use a little white bread flour *and* wheat flour. Wheat flour is really heavy and I have found through trial and error that it just.won't.rise if you use all wheat.
Once you attach the dough hook and have the bowl on. Add 3 cups regular bread flour. Once you've added the flour turn on low speed. Add 1 tsp salt.
Switching the wheat flour, add 1/2 cup at a time until the dough starts pulling together.
This is what it will look like. Remove from the bowl and knead. Don't add too much more wheat flour as you knead because it won't rise well.
You should be able to see a slight indentation in the top of the dough if you push your fingers in. And then it will disappear.
Spray your mixing bowl with PAM and put your dough back in. Let rise for an hour or until double in size. It's a cold day here in New York so it took a little longer to rise.
Once it's risen, punch the dough down and split in half.
If the dough is really sticky, knead a little more flour into it.
I use my rolling pin to roll the dough out a little. Roll up like a log.
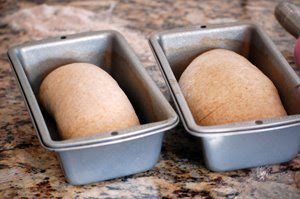
Spray bread pans with Pam and put the formed dough in. Cover and let rise. Turn on the oven to 375* at this time.
When the dough starts peaking over the top of the pan, it's time to put in the oven. Bake for about 30-40 minutes.
 When the bread is done, the tops will be really golden brown. See how much this domes up when it bakes? So awesome. I love bread and the smell that will be wafting through your house is just amazing. Wouldn't your husband be in love if he came home to that smell? I bet you he might even take the garbage out for you if you made him some of this! Pure mana.
http://docs.google.com/Doc?id=dg2vfjqm_125cwjc4bc7
Posted by
squillen
at
6:35 AM
8
comments
![]()
![]()
Tuesday, January 27, 2009
.fettuccine alfredo.

Fettuccine alfredo is one of those great foods that bring me a lot of comfort. How many of you actually make your own alfredo sauce? Do you pick up a jar or one of those DiGiorno kind in the refrigerator section of your grocery store?
I admit I used to do that... but those things cost a lot more than it takes to make your own and it's a lot better tasting because it doesn't need any preservatives to keep it fresher longer.
Let's begin with our roux (pronounced roo). In a saucepan put 1/4 cup butter, 1 clove minced garlic, and a drizzle of olive oil. Allow the garlic to saute for about 30 seconds.
While whisking, add 1/3 cup flour. You need to whisk so the flour doesn't clump up on you. Turn your burner down to low heat and let your roux continue to cook for awhile. The longer you let this go, the darker it will turn, and the more flavorful it will be. I had mine on th eheat for about 30 minutes. Don't forget about it. You'll need to keep stirring!
While whisking again, add 1 cup cream. If you're not counting calories or fat grams, add another 2 cups of cream. If you're like me and trying to keep things on the healthier side, after you add the 1 cup milk, add 2 cups milk.
Kick up the heat (medium high) and keep stirring while this thickens up. You want a gravy consistency so not too thick, okay?
Season well with salt and pepper. Taste the sauce at this point to adjust seasoning.
Take a BIG handful of parmesan cheese. I use a good quality parm for this because we're not trying to skimp on flavor and parmesan isn't a high fat cheese.
My little soux chef shows how thick this sauce is when it's done. It should coat the back of the spoon.. .or in our case, it is sticking nicely to the wires of my whisk.
At this stage, you can package up your sauce and store in the fridge for up to 3 days. We were having this with our pork chops the other night so I had a pot of fettuccine cooking while we made the sauce. After the pasta is cooked, drain well, and then mix with the sauce.
Sprinkle a little parmesan cheese on top of your fettuccine after it's been plated. Delicious! Enjoy!
Printable version:
http://docs.google.com/Doc?id=dg2vfjqm_124g3dswxhj
Posted by
squillen
at
8:36 AM
7
comments
![]()
![]()
Labels:baking, cooking, scrapbooking fettuccine, parmesan cheese, pasta, side dish
Friday, January 23, 2009
.pork loin chops w/ garlic herb butter.

 Take 2 to 4 boneless pork chops and season both sides with kosher salt, pepper, and some thyme.
 The center of the chop should give just slightly. This means the meat is cooked through. I've said it before in another post but you don't want to overcook this chop. It dries it out considerably and you'll be left with jerky instead of a delicious, moist piece of meat. The process pork now goes through with FDA regulations, it's okay if there's a little pink in the center. You won't get any kind of terrible illness. You don't want it medium rare, obviously... but perhaps a perfect medium.
Remove the pan from the heat (or just turn the heat off if you're using gas) and put a dollop of the herbed cheese on top. Before my chops were all the way done, I did put some of the herbed butter in the pan and kept coating the pork with some of the butter as it finished cooking. mmm mm mm...


