Monday, March 31, 2008

.swedish pancakes.

This is the 2nd recipe I've added tonight and I just want to make sure you check out the contest I'm having. The entry is a couple posts below. Winner gets a dozen of my almondine sugar cookies. YAY!

This morning Marcia and I wanted something more than cereal for breakfast so I made Swedish Pancakes. This is something we used to make as a family growing up but we didn't have them often because we weren't patient enough to wait for the crepes (which these essentially are) to cook for us! Growing up in a family of EIGHT, it was definitely a chore for mom to make these.

I, of course, have learned the secret to these. Make them. Freeze them. Throw them in the oven wrapped in foil and heat them up. Or, make them and put them in a dish with a lid and hold in the oven to keep warm while you whip up the whole batch.

This recipe makes 10 pancakes. You'll want to double or even triple this recipe. Trust me. Make lots.


In a bowl, whisk together:
3 eggs
1 1/4 c. milk
1 Tbsp sugar
3/4 c. flour and
1/2 tsp salt
You'll have lumps so run it through a strainer if you have one.

Use a ladle to spoon some batter into a vegetable sprayed crepe pan. The pan I'm using is not a crepe pan but it works. I really really want one! My birthday is coming up in May... *hint hint* LOL
When you ladle the batter in (about 1/4 cup), you want to kind of swirl the pan around to spread it out. Cook on one side and then use a rubber spatula to flip it and cook the other side for a minute.

This morning I sliced up some fresh strawberries to go with our pancakes and whipped up some fresh cream.
Normally we just butter and use maple syrup. So go with whatever your little heart desires.
Serve with bacon or sausage.

.marcia's banana bread.

I love banana bread. It's a great way to use up bananas that are past their prime and it's a great way for me to feel justified by eating carbs. "Hey it's got fruit in it!"


This is a recipe my sister Marcia contributed to our family cookbook. She said she got the recipe when she was on her mission in St. Louis, Missouri and the lady she got it from was the best cook she knows. (ouch! I thought I was, sister?) Oh. She said the best cook she knew on her MISSION. Whew. Close one there. She almost made it to my black list.


This is Marcia with Perry. Aren't they cute together? Perry loves her Marci.


Anyway... I used this recipe at the bakery and sold TONS of banana bread. My good friends, Anne and Julie, told me whenever I made some, to call them and they'd come buy a loaf or two. Now *that's* devotion.


You want to mash some bananas first. The recipe calls for 1 1/4 cups mashed banana which equates to about 3 or 4 bananas.


If you have overripe bananas but don't have the time to make the bread, peel and mash and put in a ziploc then in the freezer. All you'll have to do is thaw, drain of any liquid, and put in your batter.


In a large bowl, mix together:


2 1/4 c. flour
1 1/4 tsp baking powder
1 2/3 c. sugar
1 1/4 tsp baking soda
1 tsp salt


In another bowl, put:


2/3 c. oil
1 tsp vanilla
3 eggs
2/3 c. buttermilk


Mix the wet ingredients together.


Pour the wet ingredients into the dry and mix with a fork until combined. Do not overmix. Add the banana and fold in.


Add 1 cup chopped walnuts. Fold in.


Marcia personally doesn't like walnuts in her fruit bread, but she said this was pretty darn tasty. Well DUH! It's your recipe! Of course it's pretty darn tasty! Man I'm going to miss her when she leaves on Wednesday. :(


Spray a loaf pan with PAM and dump your batter in. You really only want to have the batter go up 3/4 of the way. If it's too full, you're going to have spillage in your oven and the potential for burned bread on your element and possible fire. Been there. Done that. You don't want to deal with that kind of mess. LOL So if you want, divide the batter into two loaf pans. *just* to be safe.


Bake in a preheated 425* oven for 15 minutes then turn the temp down to 350* and bake until toothpick inserted comes out clean. The high heat forces the batter to push upward and bake in a peak-like fashion. Then you turn it down to let it bake through without burning.


Personal preference here, but serve warm with lots of butter.

Printable version:
http://docs.google.com/Doc?id=dg2vfjqm_28fhwzzxjs

Sunday, March 30, 2008

.almost april!.

I cannot believe how quickly this year is going. It's going to be APRIL in TWO DAYS!!!!!!

To celebrate I thought, "Why not have a little contest?"

The winner of the contest will win one dozen of my famous almondine sugar cookies. All you have to do is leave a comment on THIS entry with both your first and last name, and on April 15th, I will put all the names in a hat and draw one.

The lucky person will be announced on that day so be sure to check back here! Good luck! :D :D

Suzanne

.turkey mango wrap.


When I had the bakery, we offered soups, salads, and sandwiches to our customers for lunch. I added gourmet type pizzas and wraps to the menu last summer and they were a hit.

One of the wraps, which was the most popular was the turkey mango wrap. It's the perfect lunch or dinner for hot nights or when you're just in the mood for something light and simple.

What you'll need for the wraps:


  • Sundried tomato wraps

  • deli turkey (or you can use cooked turkey medallions sliced up)

  • provolone cheese

  • lettuce

  • tomato

  • mango, sliced

  • mayo

  • cream cheese

  • ranch dry dressing mix
In a bowl, mix together 1/4 cup cream cheese, 3 Tbsp mayonnaise, and 2 Tbsp dry Ranch dressing mix.


Spread some of the ranch spread on a wrap.


Put down a layer of turkey and some provolone cheese (not pictured). I usually use one slice provolone and cut it in half and put down the center. Use whatever you'd like.


Put slices of mango, tomato and some lettuce (leaf or iceberg) down the center.


Fold outsides in and roll up like a burrito.


Carefully slice in half on the diagonal and serve with chips or salad.
Printable version:

Saturday, March 29, 2008

.with love from florida to alaska.


A couple weeks ago my husband and I and the girls were driving in the car. We were headed home after a long day in town running errands and my husband casually mentioned stopping by Coldstone creamery for a little treat. I was really craving key lime pie and had to think whether or not they had a lime ice cream creation there. So I looked and sure enough, they didn't!

Then I started brainstorming how *I* could make something of the sort. That's when the search began and I came up with this tasty recipe for Key Lime Baked Alaska. If you've never heard of a Baked Alaska, it's basically a mini ice cream cake covered with toasted meringue. My recipe has a graham cracker crust, key lime ice cream, and meringue on top. It is absolutely amazing!!!! Marcia (my sister) said I need to get this recipe copyrighted. LOL ( I might have to think about that one)

This is a recipe you're going to need to begin the day or night before you actually want to eat it. The ice cream needs plenty of time to harden after it comes out of the ice cream maker. And unless you have a blast chiller, give yourself plenty of time on this one


In a saucepan, put 1 1/2 c. cream. Heat over medium heat until a skin forms on top. Do NOT let the cream boil otherwise the ice cream will curdle. If it comes to a boil, you'll need to dump and start again.


Separate 4 eggs. Put the yolks in a bowl and put the whites in another container and put them in the fridge. Leave yolks out because you're about to use them.


While whisking yolks, add a little cream to "temper" them. This means the heat from the cream will cook the eggs. Pour this mixture back into the saucepan into the rest of the cream.


Whisk and cook over medium heat until it gets thick.

You want it to be thick enough to coat the back of a spoon. Remove from the heat and add 1 can Eagle brand sweetened condensed milk and 1/2 cup key lime juice. The juice can be from fresh key limes or from a bottle.

[NOTE: Key limes are smaller and sweeter than regular limes. You don't want to switch them out.]

Transfer the custard to a bowl. Cover with saran wrap and put in the fridge for half hour to an hour.


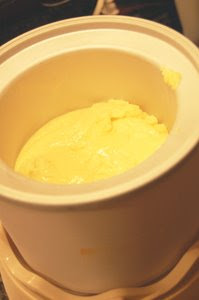
Set up your ice cream maker and put the custard in the frozen cylinder.


Make the ice cream according to the directions that came with your machine.

When it's done. Cover and put in the freezer.


While the ice cream is in the machine, make the graham cracker crust. Put 1 package graham crackers in a large ziploc and use a rolling pin to crush them. Add 2 Tbsp sugar and 1/2 stick (1/4 cup) melted butter. Shake to mix and smoosh the outside of the ziploc to get it all worked in. Divide the crust into four ramekins and press into the bottom and up the sides. Put in the fridge to set.

After about half an hour, remove from fridge and take the ice cream out of the freezer and spoon into the ramekins and fill all the way to the top, using a knife or spatula to smooth the top. Cover each ramekin well with saran and put back in freezer. Freeze overnight.


Just before serving, make the meringue.

Put the egg whites you held over from the ice cream and put in a large mixing bowl. Put the bowl on top of a saucepan with some water in it. Turn the burner to medium.


Whisk until the whites get hot. Add 1/4 cup sugar. Whisk for another minute and then remove from the double boiler.


Put the kitchen aid bowl on the mixer and use the whisk attachment. Turn to a medium speed.


Whisk until you get stiff, but not DRY peaks.

Stiff peaks are when you stick the whisk in and pull out, the peaks stay firm and won't sag or fade away.

Set aside.


Pull your key lime filled ramekins out of the freezer. Sit in a bowl of warm water or carefully put under the faucet. This will loosen the ice cream and crust from the sides of the ramekin.

I had to use a knife and insert it in until it was loose enough to pop out.

Set it on a dessert plate.


Put an extra large star tip in a piping bag and fill with meringue. Pipe in a circular motion starting from the outside of the ice cream and work your way in, building up as you go.


This is what you want it to look like.

Kind of looks like a cupcake. ;)


Now it's time to "bake" the meringue. I have a blow torch for making creme brulee. You can just as easily put these under a broiler and brown the tops.


Once they're baked, put a wedge of key lime on top and hold in the freezer if you're not quite ready to eat them.

Printable version:
http://docs.google.com/Doc?id=dg2vfjqm_26gq3fjmd2

Thursday, March 27, 2008

.i've been tagged.

I've never been tagged before but I noticed on the comments for the Low Country Boil, I was tagged by Laura Davis. Thanks Laura! I hope I do this right and don't screw it up. *lol*

Here are the rules:

1. Link to the person that tagged you and leave a comment on their blog, so that their readers can visit yours.
2. Post the rules on your blog.
3. Share 7 Random facts about yourself on your blog.
4. Tag 7 random people at the bottom of your post, linking to their blog. Let each person know by leaving a comment on their blog.


Here are my 7 random facts:

  1. I once spent $600 at Target in ONE shopping trip.
  2. I'm from Seattle, Washington originally and have lived in Hawaii, Virginia and now here in Georgia.
  3. I taught piano lessons for 15 years before deciding to open a bakery.
  4. I was a vocal education major in college.
  5. I have 4 brothers and 3 sisters with me falling right in the middle at #4.
  6. Having grown up in Seattle all my life, I've never been to Canada. Tried once, but my car broke down 20 miles from the border.
  7. I cannot stand mustard. I can't stand the smell and if it touches me.. WATCH OUT!

Here are the 7 random people I'm tagging!

Kami
Kara Henry
Lori
Steph

Angela Daniels
Magz
TanyaB

Wednesday, March 26, 2008

.mongolian beef.


Mongolian Beef is a FAVORITE of ours when we go to P.F. Changs. A sweet teriyaki sauce coated on strips of tender beef and slices of green onion. Yummy! My sister, Marcia sent me the copy cat recipe for this years ago and I make it on occasion. It's not hard so I'm not sure why I don't make it more often! I hope this becomes a favorite in your home. :)

In a saucepan, heat some olive oil. Saute 3-4 cloves minced garlic and about 2 teaspoons minced gingerroot. If you don't have gingerroot, you can use ground ginger but it won't give you the exact taste.


Saute only a minute or else your garlic/ginger will burn. Quickly add:

1 c. soy sauce
1 c. water and
2 c. brown sugar

Bring this to a boil and then reduce heat to low.


Let it bubble and reduce for about an hour and half. You want this mixture to reduce to where it's really thick and syrupy and will coat the back of a spoon.

[NOTE: If you want to make double... triple the recipe, you can store this in a jar in the fridge for a month or two. Makes for quick meals especially if you don't have an hour or two to let the sauce reduce each time you want teriyaki.]


This is flank steak. About 2 pounds of it.

Holding your knife at a 45 degree angle, you want to slice the meat thinly.


Put the sliced meat into a ziploc and dump in about 1/4 c. cornstarch. Seal and shake to coat the pieces.

Heat oil in a wok or skillet on medium heat.


Carefully put some strips of beef in the hot oil and "flash fry" for 2 minutes.


Remove from the oil and place on a paper towel. Repeat until all the beef has been fried.


Put the fried beef, some sliced green onion, and the teriyaki sauce in a large bowl. Stir to coat. Transfer to a baking dish and put in a 350* oven for 15-20 minutes. This will allow the sauce to cook into the meat.


To go with this, I quickly sauteed some zucchini, summer squash, and red onion in some olive oil with minced garlic and gingerroot. To keep the veggies from burning, add a little water and soy sauce. Remove from skillet once the onion are nice and soft.

I also served the Mongolian Beef with steamed rice.

Printable version:
http://docs.google.com/Doc?id=dg2vfjqm_25fvmknpd3

Tuesday, March 25, 2008

.low country boil.


Low Country Boil is a traditional southern style shrimp boil. There's a restaurant in Savannah that we always go to called The River House Restaurant and Bakery right on River Street that has this and we always get it when we're in town because it's not only delicious, but it feeds the two of us easily. Traditional LCB doesn't have crab in it, but we are BIG crab lovers so I always throw some in the pot.

Here are the ingredients you'll need:

  • Red potatoes

  • Crab legs

  • Shrimp (peeled)

  • Corn on the cob

  • Kielbasa

  • Zatarain's crab boil seasoning

  • Old Bay seasoning


First we need to make the clarified butter. Clarified butter is butter with the milk fat removed. That's the cloudy film you get when you melt butter.


Put some sticks of butter in a small saucepan. Melt on LOW heat. You don't want to boil the butter because that will keep the milk fat from floating to the top.


Once it's melted, use a spoon and carefully skim the foam off the top. That there folks is the milk fat. We don't want that.


Once that has been skimmed from the top, you'll be left with beautiful clear butter. CLARIFIED butter.


Cut up some red potatoes and set aside.


Cut up your keilbasa and set aside.


Measure out 4 Tbsp Old Bay seasoning and get your crab boil in a bag ready to go.


Get the largest pot you have. I have a pasta pot that I use for this and as you will see I used the strainer insert. I wound up taking it out because I couldn't get as much crab in the pot as I would have liked. So save yourself the trouble and LEAVE the strainer out but rather put it in the sink so you have it ready for straining once everything's cooked.


Add your potatoes and spices (Zatarain's and Old Bay) to the pot. Bring to boil and let boil for 5 minutes. At that time, add the kielbasa and boil for another 10 minutes.


I highly recommend using fresh seafood whenever possible, but you can use frozen. I always keep crab and shrimp in the freezer.. and corn on the cob, for quick meals.


When the 10 minutes are up, add as much crab, shrimp and corn on the cob to the pot. Cook only 4 minutes and then remove the pot from the stove and drain.


Put in a big bowl and serve.


The fun thing about LCB is that it's basically a free-for-all. Just dig on in and eat til your heart's content.


If you notice in the picture below, I used paper sacks for placemats. Just cut off the bottom of a paper grocery bag, and cut down the sides, folding the flaps over. As you eat, you can put all your shells on the paper and when you're all done, just remove your dishes and carefully wrap up the shells and toss in the trash. EASY CLEANUP!


Oh and that clarified butter we made? Put some in little bowls for dipping shrimp and crab in. We also like to have some tartar sauce and cocktail sauces on the table. Enjoy!


Printable version:
http://docs.google.com/Doc?id=dg2vfjqm_24crxj6mc6