Thursday, August 25, 2011
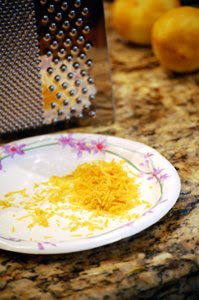
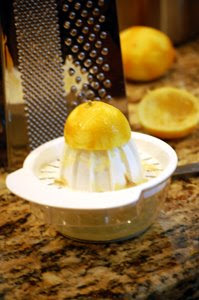
.fresh squeezed lemonade.
Posted by
squillen
at
9:00 AM
0
comments
Labels:baking, cooking, scrapbooking beverage, lemon, summer
Sunday, October 4, 2009
.croquembouche w/ lemon cream filling.

Last weekend, I went to a social at church. We were asked to bring a "dessert for one" wrapped as a gift. I spent about a week debating what to make. I had originally thought I'd make some kind of sponge cake with mousse filling, but I wasn't sure how long something would be sitting out and I didn't want the mousse to melt all over the place. That would have been a disaster! Well, I decided to make a croquembouche, which is a fancy word for cream puffs stacked all pretty like in a pyramid shape and draped with spun sugar.
Don't be intimidated by the picture. This is a very IMPRESSIVE, do-able dessert that makes a statement for parties, or even for intimate dinners. You can make the cream puffs bigger, or smaller, just make sure you keep the sizes consistent otherwise it'll look strange.
I filled the cream puffs with a lemon cream that brought these babies into a whole new dimension. The contrast of the tart with the sweetness of the spun sugar and caramel "glue" is pure perfection. I know you'll enjoy this if you make the recipe.
First, make the lemon cream filling.
Juice 2 small lemons or 1 large. You need 4 Tablespoons lemon juice. Zest the lemons too. You need 1 Tablespoon zest. Set aside.
In a bowl whisk 9 egg yolks, 3/4 cup sugar, the lemon juice, and 1/2 cup flour.
After whisking, pour it through a mesh sieve to remove any lumps or egg particles.
Put 2 cups cream in a saucepan and bring to a scald. Do not let it boil.
While whisking, pour some of the hot cream into the egg yolk mixture. This is called tempering the yolks. If you had added the egg mixture directly to the hot cream, it would have instantly cooked the eggs and made scrambled eggs. Ick. After whisking in some of the cream into the yolk mixture, add the yolk mixture back into the saucepan and put back on a burner and kick up the heat. Whisk constantly while this cooks so it doesn't burn on the bottom. It will start thickening up quickly.
As soon as it's thick, remove from the heat and add 1 Tablespoon butter and the lemon zest. Set the pan in a shallow bowl of ice water to stop the cooking process and cool the filing down.
To store, put in an airtight container and keep in the fridge until ready to use.
This filling can be made up to 2 days ahead of time.
For croquembouche, I use my basic cream puff recipe. Pipe small little dollops on a buttered cookie sheet and touch the pointy tips with a wet finger.
Bake at 375* until nice and golden brown. It's safer to overbake these a little so they don't collapse on themselves. We need them to stay firm.
When the cream puffs are baked and cooled, poke the bottom of each puff with a chop stick or any other tool that's similar.
Fill a piping bag with the lemon cream and stick the tip of the piping bag into the bottom and squeeze. Don't overfill.
I made a little cone out of cardstock and wrapped with foil. Since I was taking this somewhere, I needed a disposable base so I cut a piece of cardboard from an old box and wrapped that with foil too. To adhere the cone to the base, dip into the pan of caramel sugar and then press down. It cools quickly so you won't have to hold it down long.
If you're using a plate, use the same method.
For the caramel/sugar for spinning, put in a saucepan:
2 cups sugar
1/2 cup corn syrup
1/2 cup water
Put the pan over medium heat on the stove until the sugar dissolves. Let this cook until a candy thermometer reaches 110*.
Carefully dip part of each filled cream puff into the sugar and start stacking around the cone. There will be some gaps between each puff. That's okay. We'll camoflauge with the spun sugar.
This part is FUN but so messy. Make sure you put a towel down on the floor and put paper under the pans.
I put two saucepans down and sprayed the handles with Pam. Dip a fork into the sugar and drizzle it back and forth from the handles. Do this until you have a good buildup of thin strands of sugar.
This cools almost immediately so you don't have to let it stay for long. Remove from the handles and repeat until you have as much spun sugar as needed.
I put a silpat down on a cookie sheet and poured some of the caramel/sugar to create some designs. Break them apart when they cool and harden.
Carefully wrap the croquembouche with the spun sugar so that it spirals down the cone. Stick pieces of the broken sugar pieces around the cake, and at the top. Serve immediately!
Posted by
squillen
at
11:10 AM
16
comments
Labels:baking, cooking, scrapbooking cake, cream puff, dessert, lemon, lemon cream filling
Sunday, March 29, 2009
.lemon chicken.

So the other day I asked you guys what I should make for dinner. Mango Shrimp or Lemon Chicken. Well, DH woke up wanting chicken so I went with the latter choice. Here in this town we moved to, there's a chinese restaurant but honestly, in my opinion, it really stinks. The food is just awful and there are no other chinese choices so if we want that type of food, I have to make it myself. I'm not complaining, but making chinese food can be very time consuming. This dish, however, isn't bad at all. In fact, you can have this made in about 45 minutes! You can't beat that!
The chicken is going to take the longest because we have to ensure it's baked through. Yes.. I said baked. Instead of deep frying and having all of those extra calories, we're going to put this in the oven.
Start by taking 4 chicken breasts (or 1 per person) and put on some saran. Wrap the saran so that it's on the top and bottom of the breast. Using a mallet or a heavy saucepan, pound out the thickest part of the breast. We want to make sure the chicken is the same thickness throughout to ensure even baking.
Season the breasts with salt and pepper.
Sprinkle some flour on both sides of the chicken and rub in to coat.
In two separate bowls, put 2 eggs in one, and some panko in another. Panko is japanese bread crumbs that are super super fine and light. I love them and they are essential in Japanese/Chinese cooking.
First coat the chicken breasts in the egg, then put in the panko and make sure they are well breaded.
Drizzle a little olive oil in the bottom of a baking dish and place the chicken breasts in. Pop in a 350* oven for about 30 minutes. To check if they're done, touch the chicken breast and if it's still squishy (which it shouldn't) then cook a little longer. The breast should be firm but not hard.Now, while the chicken is in the oven, make the rice. The rice will take 20 minutes to prepare. In a pot put 2 cups rice and 3 3/4 cups water. Bring to a boil and stir. Put a lid on, turn the heat down to low low low and let it steam for 20 minutes. You will *always* have perfect rice doing it this way.
Once the rice has been put on the burner, let's make the lemon sauce. So super easy!
Juice enough lemons to make 2/3 cup. This took us about 6 small lemons. Strain so there are no seeds and put in a saucepan.In the same saucepan, add 2/3 cup sugar, 2/3 cup water, a couple shakes of black pepper and 1 Tbsp cornstarch. Whisk everything together.
Before you throw away the juiced lemon rinds, use a vegetable peeler to peel off some of the zest. We don't need a lot but just enough to give a yummy lemon boost to the sauce.
The sauce itself, does not take long to cook. Maybe 7 minutes, so don't make too early or else it could form a skin on top.
Remove the chicken from the oven, let rest for a minute, then slice on the diagonal against the grain. Plate and spoon on some of the lemon sauce. Serve with rice. I also served mine with broccoli made asian style. If you're interested in that recipe, read on. Otherwise, bon appetit!Asian style Broccoli
3 cups cooked broccoli
Thursday, March 19, 2009
.lemon meringue cupcakes.

In a bowl, put 2 whole eggs and 4 egg yolks. Make sure you reserve the whites from those 4 eggs in a separate bowl. We'll need them for the meringue.
Zest 3 lemons. I use the small grater on my grate box to do this. Don't zest your lemons too far in advance because these will dry out if left out too long.
Turn the burner onto LOW and stir constantly with a wooden spoon until the mixture becomes thick enough to coat the back of the spoon. There will be lumps in this but don't be worried. We'll take care of that in a minute.
Dump it all into a fine mesh seive and use the wooden spoon to force it through. This will filter out any of those lumpy egg particles. Make sure you scrape the bottom side of the seive once it's all been pushed through because there will be a lot clinging to it.
Now take 4 Tablespoons of butter. Drop one piece in at a time and stir as it melts. This will incorporate the butter into the curd, giving it a velvety smooth texture. Repeat until all of the butter has been added. Do not add it all at once. It won't work and will cool the curd off too fast before it all melts in.
Cover the curd with saran. Make sure you let the saran sit directly on top of the surface. This will keep a skin from forming. Put in the fridge and allow to chill.
Now for the cupcakes! In a mixing bowl, put 1 stick (1/2 cup) butter, at room temp and 1 cup sugar. Cream until smooth.
Remove from the oven when a toothpick inserted comes out clean. Pop from the pan and allow to cool on a baker's rack.
When they're finally cool, use a sharp knife to cut out the centers. I removed some of the cake from the "lid".
Remember those 4 egg whites we saved from the curd? We're going to need those. They need to be almost room temperature. You'll get fluffier egg whites if they lose the chill from the fridge.
Pipe onto the the surface of the cupcake. I made it all spikey, but you can pipe it on however you like.
Posted by
squillen
at
11:05 PM
12
comments
Labels:baking, cooking, scrapbooking cupcake, dessert, lemon